
Prototype 1
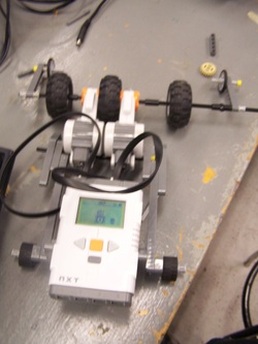
Our first attempt was not successful in climbing the ramp in the vertical position. In this design we decided to try to make it as compact as possible, so as not to make the robot drag too much weight behind the motors. We decided to use two motors and placed two small wheels in the back and three larger wheels in the front. There are also 2 smaller, skinnier wheels underneath to clasp onto the board. This is what went wrong with the robot. The wheels underneath the board were too tight causing the long connectors on the top to bend and come apart. On our next prototype we plan to keep the basic shape of the robot and change only the front wheel format. There will be the one, center wheel on the top and two of the larger wheels on both sides underneath.
Prototype 2
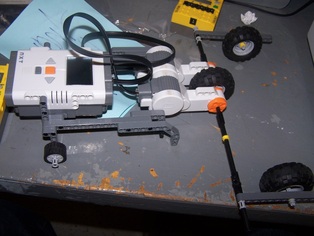
We redesigned our robot to have the one central wheel on top, with two larger wheels on both sides underneath. This also seemed to be unsuccessful. The wheels under the board would not rotate, which made the robot get stuck and break apart. Since we have been working with the same shape robot for a while now, we have decided to scrap it and try a new design. Thie design will have motors on each side clasping the board and two large wheels on both the top and bottom.
Prototype 3
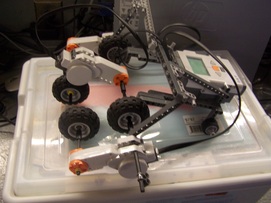
The problem with this robot was that the wheels underneath were not sturdy. We didn't have a long enough piece left to place them far enough under the board to hold. Also, when we turned on the robot, the underneath wheels would start to turn outwards and fall off the ramp. This is because the pieces would bend, which would cause this to happen. Our next idea is to connect the pieces underneath to make the robot go straight.
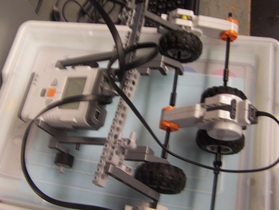
Prototype 4

In this design, we connected the pieces underneath, but took away one of the wheels. When we put this onto the ramp, the underneath was not tight or sturdy enough to hold the rest of the robot. This would cause everything on top to sink back and make the top wheels come off of the board. For this reason, the robot would not go up the ramp. For our next prototype we need to find a way to make the underneath more sturdy to hold the top of the robot.
Prototype 5
Our last prototype was a success. In this design we added another wheel on the bottom to give it more support across. We also moved the piece going across the top, down one level to tighten the wheels when they're on the board. This worked and let the robot go up the ramp smoothly on the highest inclined ramp, finishing our first design challenge.
Incline Bot
| incline_video.mov |
