Part 1
Step 1: Identify the need or the problem. Each design challenge had a purpose for
which it was supposed to be made. Recognizing this is the first step.
Step 2: Research the problem. After recognizing the problem, we reasearch ideas to
help us during our challenge. Our research was mostly done through youtube
videos.
Step 3: Develope possible solutions. Each time after finishing our research, we would
then brainstorm all possible ideas we think of and have seen being used in
other successful projects.
Step 4: Select the best possible solutions. After we brainstorm, we had to simplify
this list into a few ideas that we could incorporate into the same robot.
Step 5: Construct the first prototype. Using our decided brainstorm ideas, we would do
our best in constructing this into our first prototype and begin the trial and
error process.
Step 6: Test and evaluate the solutions. After finishing making our first prototype we
would test it, evaluate where we stand, and think of new ideas to improve our
robot.
Step 7: Communicate the solutions. This would be when we again decide which ideas
are best to bring into our next prototype.
Step 8: Redesign. This is where we would rebuild our robot with the new ideas. This
would be repeated until our prototype becomes successful in the challenge.
Part 2
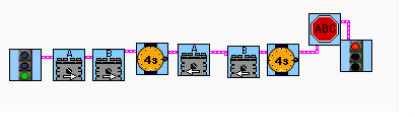
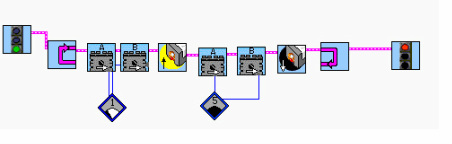
4 seconds forward, stop, 4 seconds back.
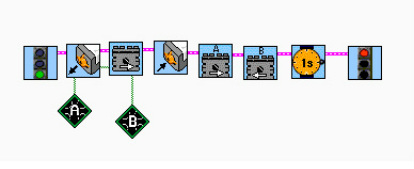
When touch sensor is pressed, start moving for 3 seconds, then stop.

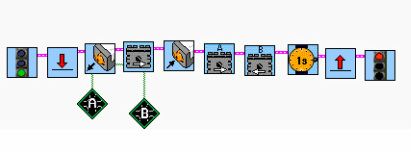
Move forward (touch sensor in out position), back up & turn for 1 second.
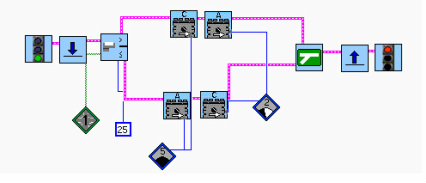
Add a jump/land icon to repeat indefinitely.
Follow a black line using a light sensor.
Back up every time it sees a black line.
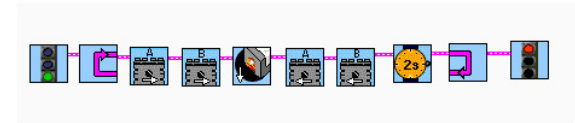
Travel a distance of 3 feet. (Radius is 1.25)
Part 3
1. The 8 steps of the engineering design process, and how to follow them.
2. How to create a organized weebly website.
3. How to program our NXT robot using Robolab 2.9.
4. How to use Movie Maker and combine all different files into one final project.
5. How to add a video to our website, by scripting in custom HTML.
6. How to upload a video to youtube, and then add it to our weebly website in a form
of a button.
7. We learned how to use the trial and error process, while coming up with the best
deigns for each design challenge.
8. How to use different gear ratios to make the robot slower, faster, or gain more
power.
9. We learned how to hook up our NXT robot to a bluetooth controller, then program
the controller to the robot's different needs.
10. We learned how to connect the camera to our robot, connect to the tv, and use this
to find objects from the tv picture.
11. How to write paragraphs using different writing techniques such as voice, fluency,
and word choice.
12. How to create a informative script, to then translate that on to GoAnimate,
making a fun learning experience.
13. How to use Microsoft Paint to transfer our programs from Robolab, into a picture,
to put on our weebly website.
14. We learned how to find velocity during our speedy bot challenge, by using velocity
equals distance divided by time.
15. We learned how to work as a team, and be cooperative with each other's different
ideas, contributing to our robot.
Part 4
1. For a tug of war bot, we would use a small to big gear ratio. This would make our
robot slow, but extrememly powerful.
2. For a speed challenge, we would use a gear ratio of big to small. Our robot would
not be powerful, but it would be very fast.
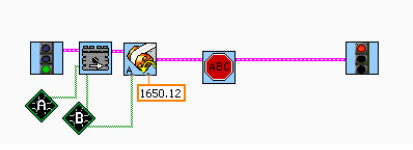
3. This program waits until it hears a sound. When it does, motor A goes forward for
380 degrees, then it stops.
4. This program logs the light sensor data for four seconds, while motors A and B go
forward. Then the data logging stops.
5. Roach Bot program.
robot slow, but extrememly powerful.
2. For a speed challenge, we would use a gear ratio of big to small. Our robot would
not be powerful, but it would be very fast.
3. This program waits until it hears a sound. When it does, motor A goes forward for
380 degrees, then it stops.
4. This program logs the light sensor data for four seconds, while motors A and B go
forward. Then the data logging stops.
5. Roach Bot program.
6. Weebly will only accept a maximum file size of 5 MB (5120 KB). This is about
10 seconds of a video file.
7. A prototype is the original model (robot design) on which something is based on or
formed.
8. Our favorite deisgn challenge was the camera bot, because it was something
interesting and different from any other design challenge.
10 seconds of a video file.
7. A prototype is the original model (robot design) on which something is based on or
formed.
8. Our favorite deisgn challenge was the camera bot, because it was something
interesting and different from any other design challenge.
